I’ve been working away and making good progress with my yarn stash organizing and cataloging! It feels good to see my Yarn Stash Notebook filling up with yarn samples and data, and to see my Yarn Stash becoming more orderly, accessible, and therefore useable!
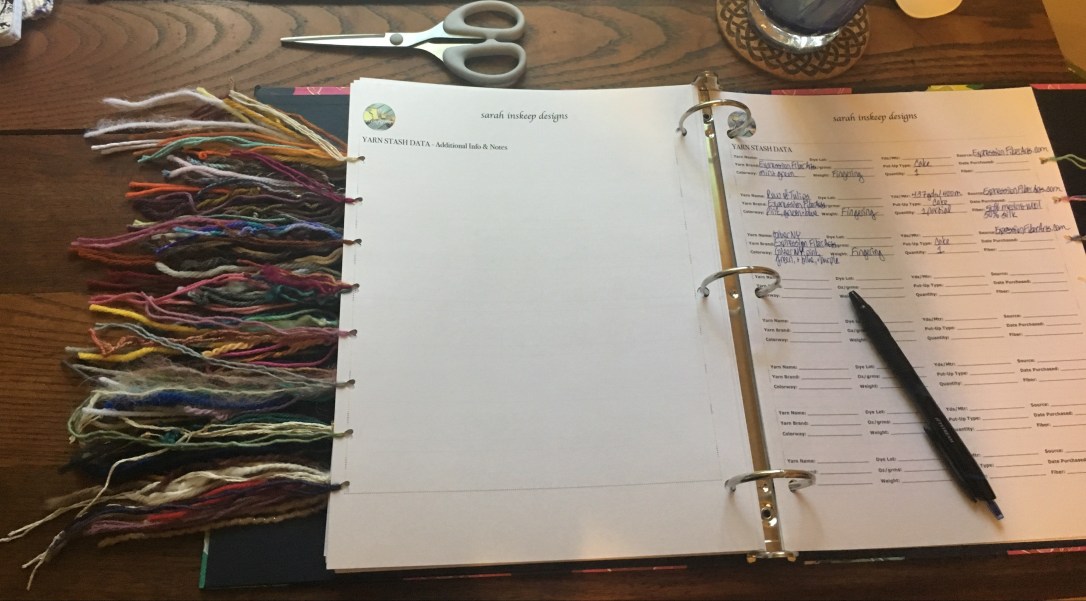
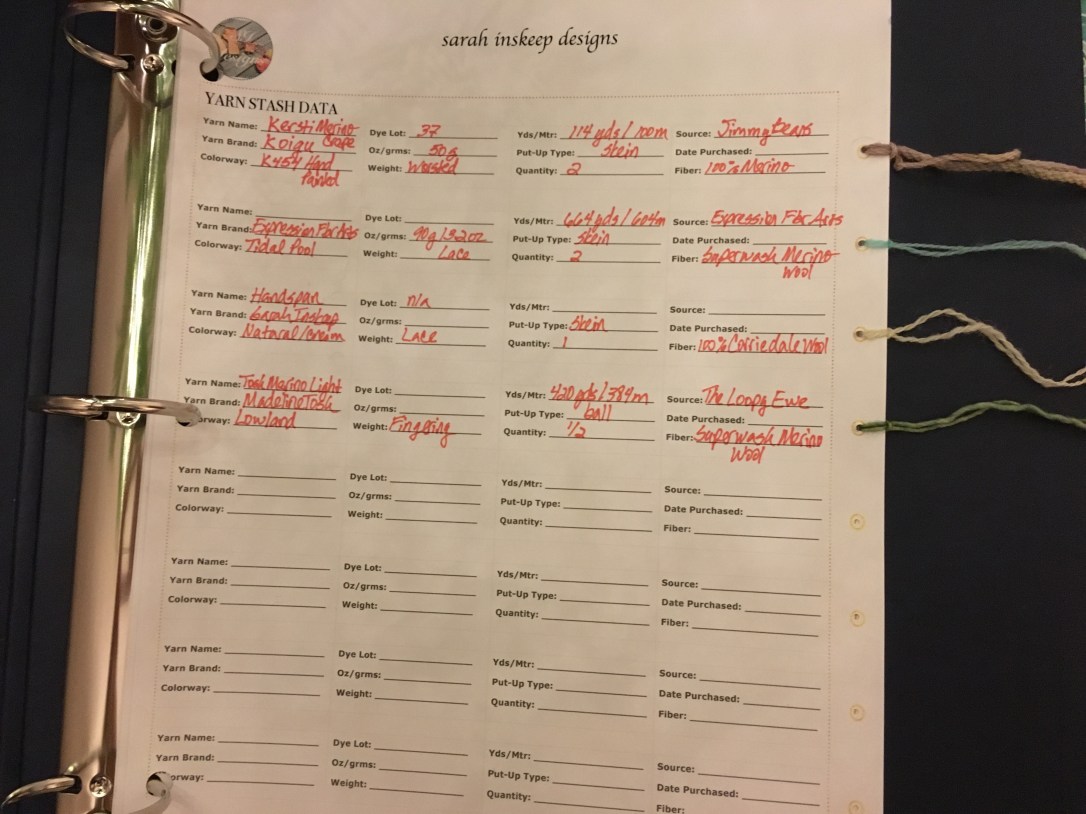
Progress on the Yarn Stash Notebook!
I do take frequent breaks to do some actual knitting though! 😉
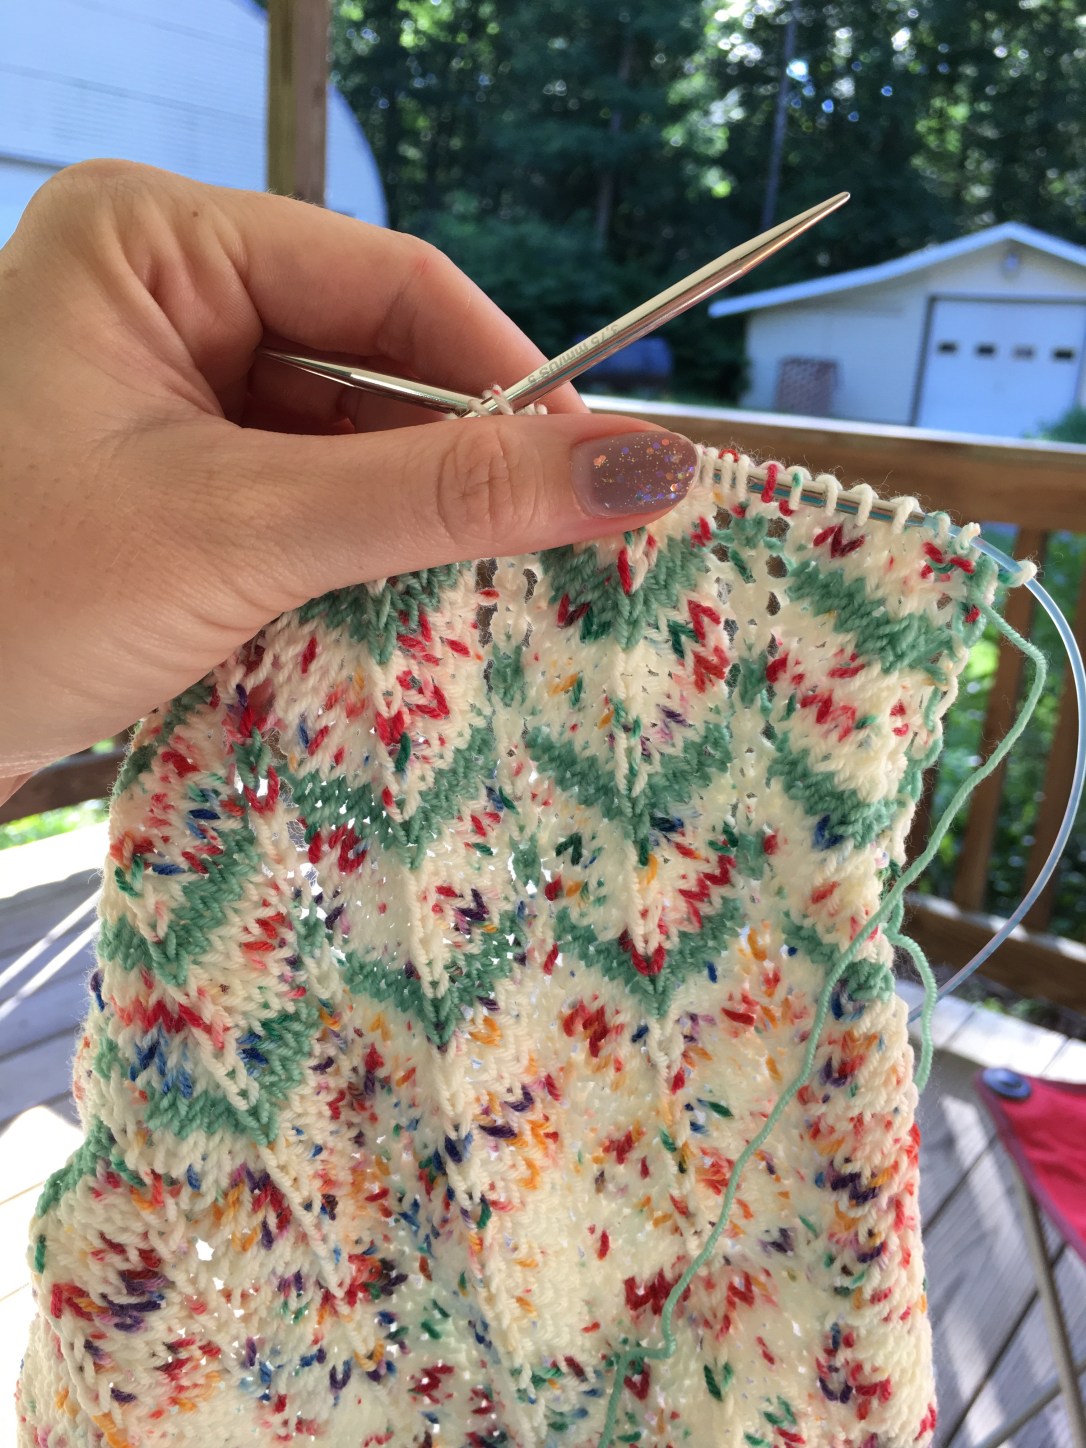
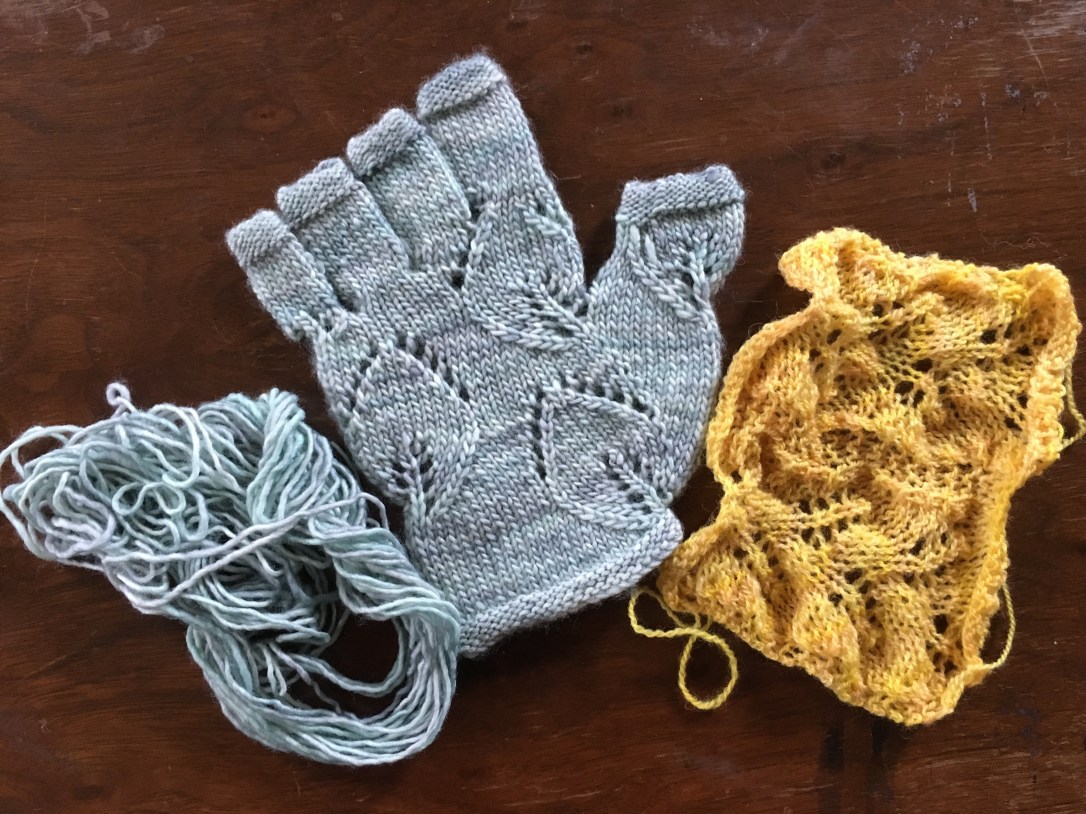
Right now, I’m loving knitting the sample for my newest design (coming soon!!)! 🙂
The pattern is “Leaves of Grass” by Jared Flood (Brooklyn Tweed)…
Feeling like I need to switch to a longer cable soon…!
The yarn I’m using is Madelinetosh Pashmina in “Thoreau.” It’s super soft and squishy and feels lovely in my hands as I knit. I can’t wait to snuggle up in this shawl on those cool Autumn evenings (they are still a long ways off, so I have plenty of time to finish!) 🙂
This is the very first time I’ve ever knitted a circular shawl, and I’m finding that I’m really taken with the ease and simplicity of the Pi Shawl construction! At the beginning of this project, the one piece that I had absolutely no idea how to do was the circular cast on. This tutorial by Knit Picks was super helpful, and I quickly discovered that it’s not as hard as it looks! 🙂
Working on Leaves of Grass with grass for company! 😉
Something I’m really enjoying with this knit is the excitement whenever I finish one chart and move on to the next! It’s fascinating to see how the different motifs fit together, play on each other, and seem to grow together! (This effect with the stitch patterns will be easier to see after blocking!)
Leaves of Grass shawl.
Now that I’m on the second-to-last chart and have completed the last increase round, I have a total of nearly 600 stitches on my needles! Even though each round now takes a while to complete, I’m still excited and enjoying working this shawl! I can’t wait to see it finished! (And I’m sure I’ll be knitting another circular shawl before long!) 😉
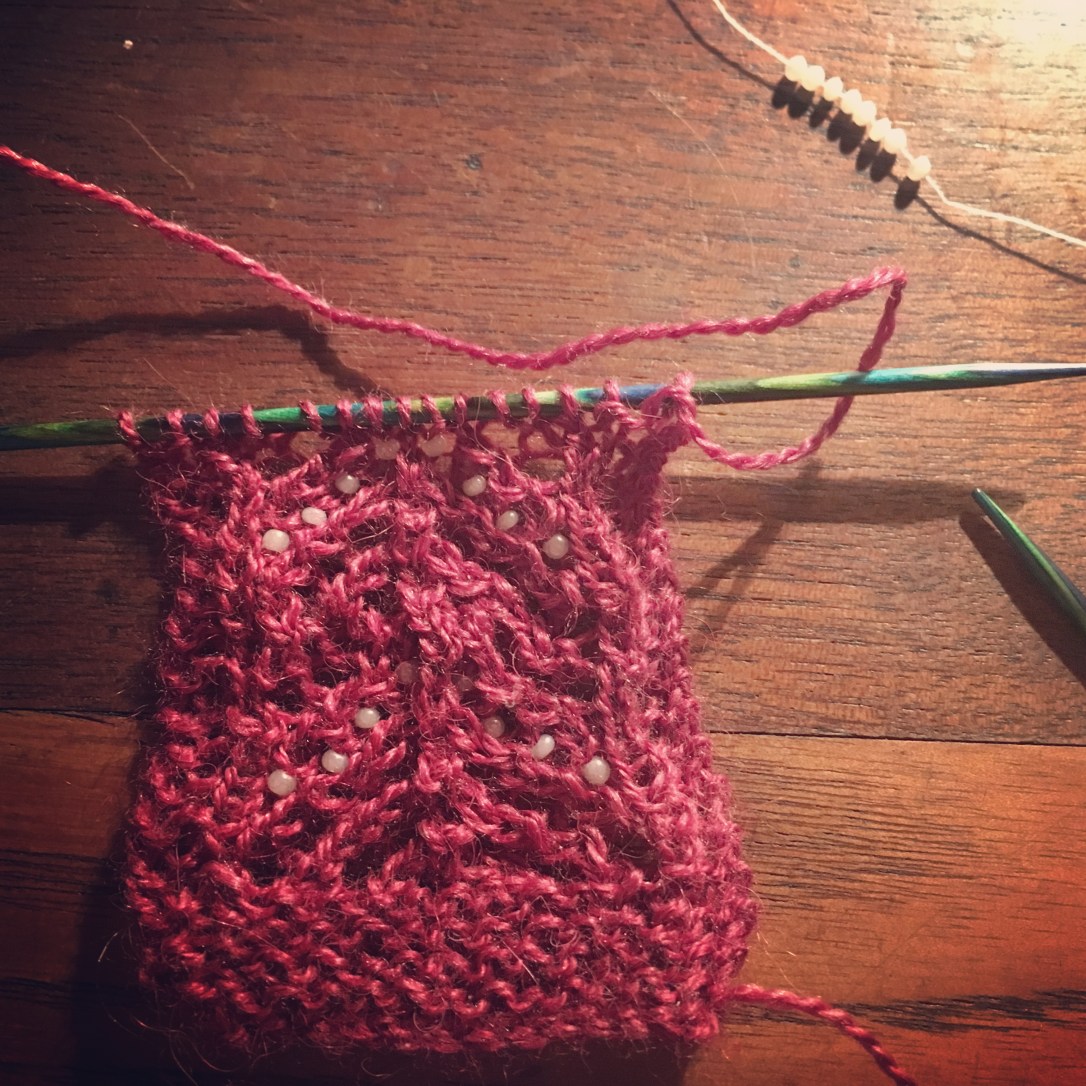
And last but not least, I’m trying out something new – knitting with beads!
Practice Swatch: Arrowhead lace with beads.
This is just a little practice test swatch I’m working with some leftovers of a gorgeous alpaca yarn and some seed beads I have on hand. It took me awhile to decide where to place the beads with this Arrowhead Lace stitch pattern, and I’m still not quite sure I’m happy with the result. I think I’ll knit on it a little more and then block it and see what I think then. 🙂
Of course, I’d love to hear your thoughts too! 🙂 Where would you place the beads in this stitch pattern? Have you ever used beads in your knitting before? If so, what do you think of the technique? Do you like the effect?
I’d also love to hear about whether you’ve knitted or considered knitting a circular shawl before! If you’ve made one before, did you enjoy the experience? Why or why not?
As always, best wishes to each of you, and happy knitting!
Reduce, Reuse, Recycle; Organizing to Shop your own Stash!
One of my biggest goals this year is to organize my yarn stash and make it easier to know what I have and find what I need so that I can use the gorgeous yarn I’ve collected! I’m sure this is something many of us fiber people can relate to. 🙂 Now that my stash takes up more than two large plastic bins, I’ve decided to buckle down and put it in order! Here are five steps I’m using to approach this project: 1) Review & Sort, 2) Sub-Categorize, 3) Document Yarn Data, 4) Storage, and5) Shop Your Stash! I’ll also be sharing some helpful resources I’ve made, along with some that I’ve found along the way in my research!
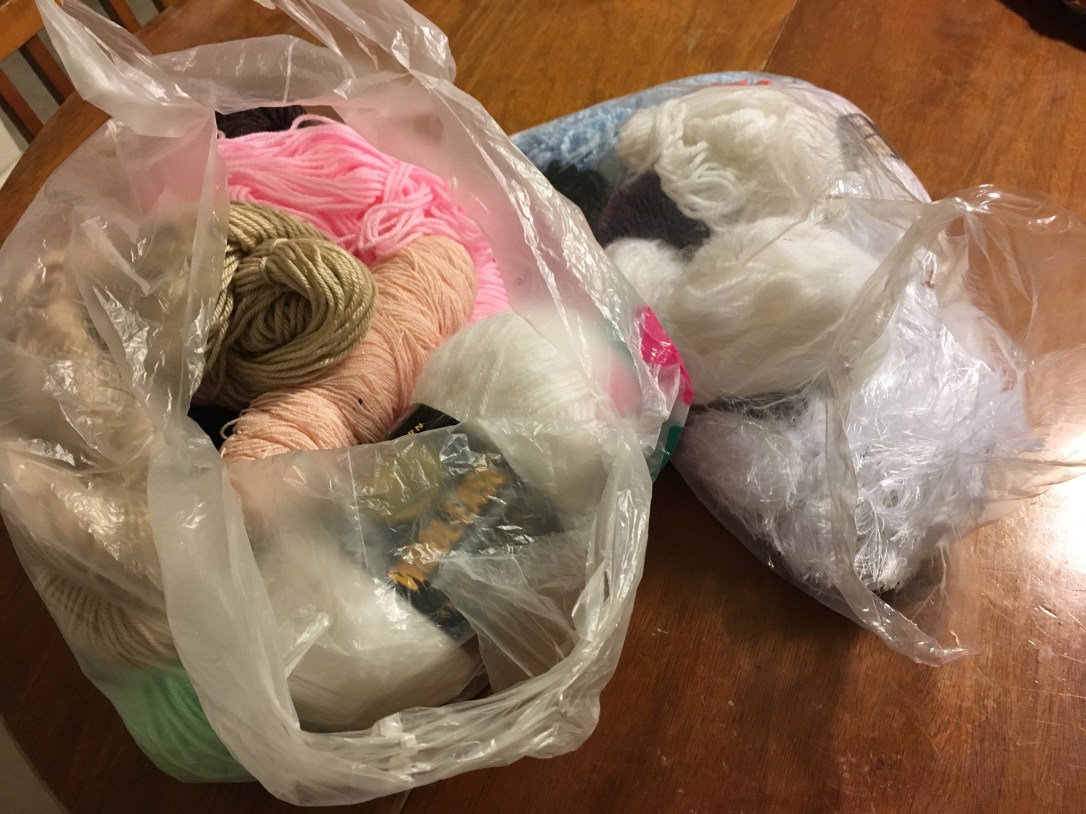
A couple of “Before” pics…
Though these pics don’t show my entire stash, they do show the previous state of chaos… 😉
Step 1: Review & Sort…
I started with preliminary sorting first, which happily for me, is one of my favorite things! (If sorting is NOT one of your favorite things, don’t worry, this part is relatively quick!) I pulled out all my yarn and sorted it into five piles similar to what Lion Brand recommends in their post “12 Tips on How to Organize Your Yarn Stash…”
The WIPs (Works in Progress) pile includes all of my currently in-progress but un-finished projects and the yarn to finish them.
The Will Use Have Pattern pile is composed of yarn that I’m not only sure I will use, but know what pattern I’ll use it with, AND actually have the pattern. Its a sort of pre-WIPs pile! This pile turned out to be rather larger than I had expected. It must be because I plan faster than I knit… 🙂
Previous method of storing Will Use Have Pattern yarn…
Will Use Have Pattern yarn revealed!
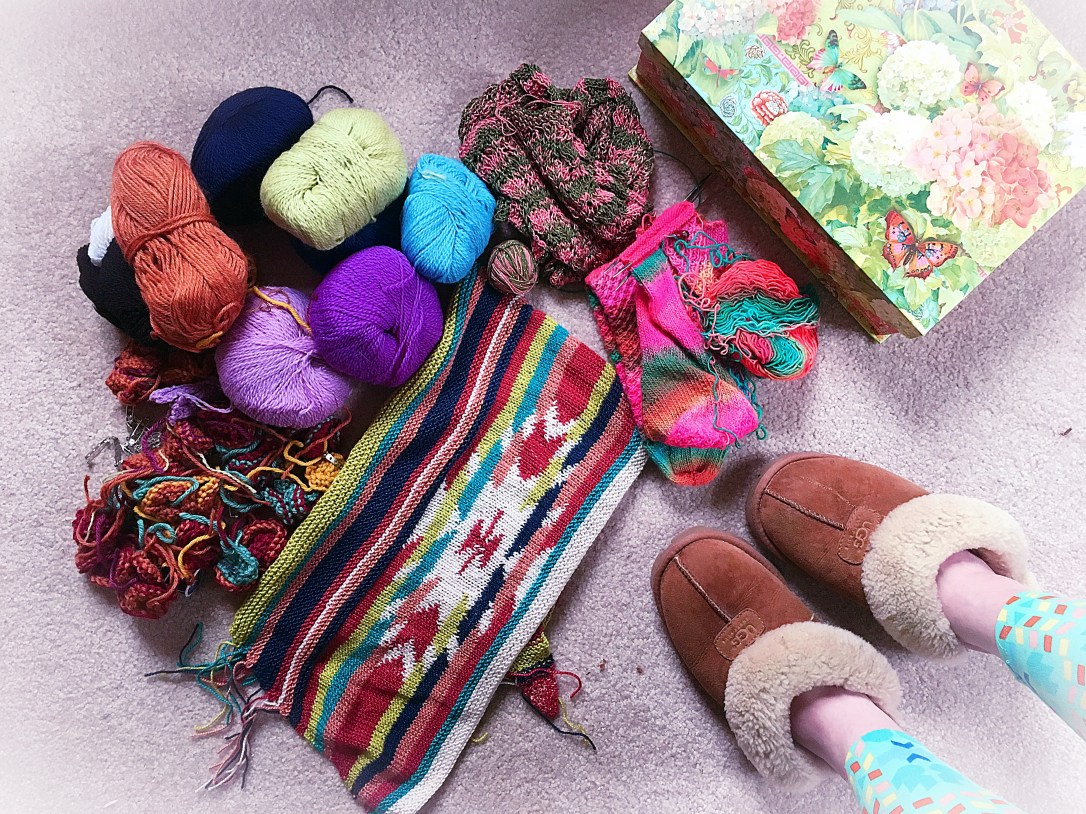
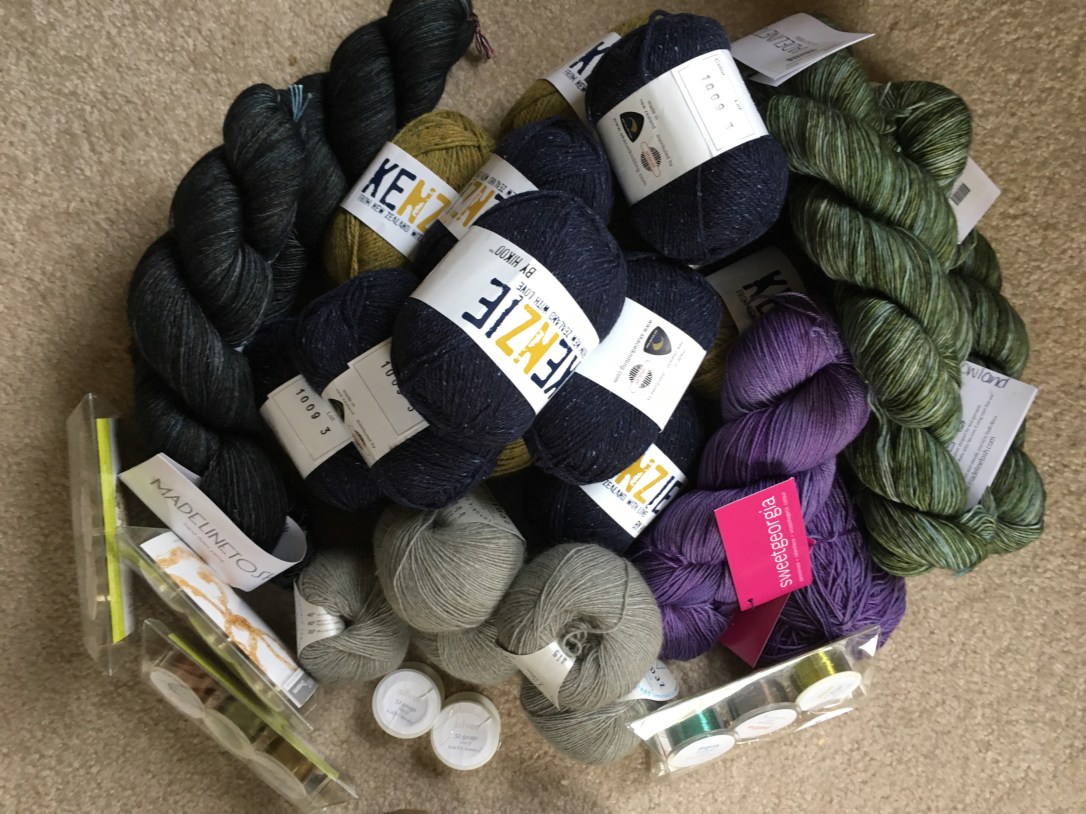
The Will Use No Pattern Yet pile holds all the yarn that I know I will use, but either don’t have the pattern I want to go with it, or don’t know yet what pattern I want to use. This is one of the most exciting portions of my yarn stash because it is all yarn that is free and available, which means the possibilities are practically endless!
A wholelot of Will Use No Pattern Yet yarn!
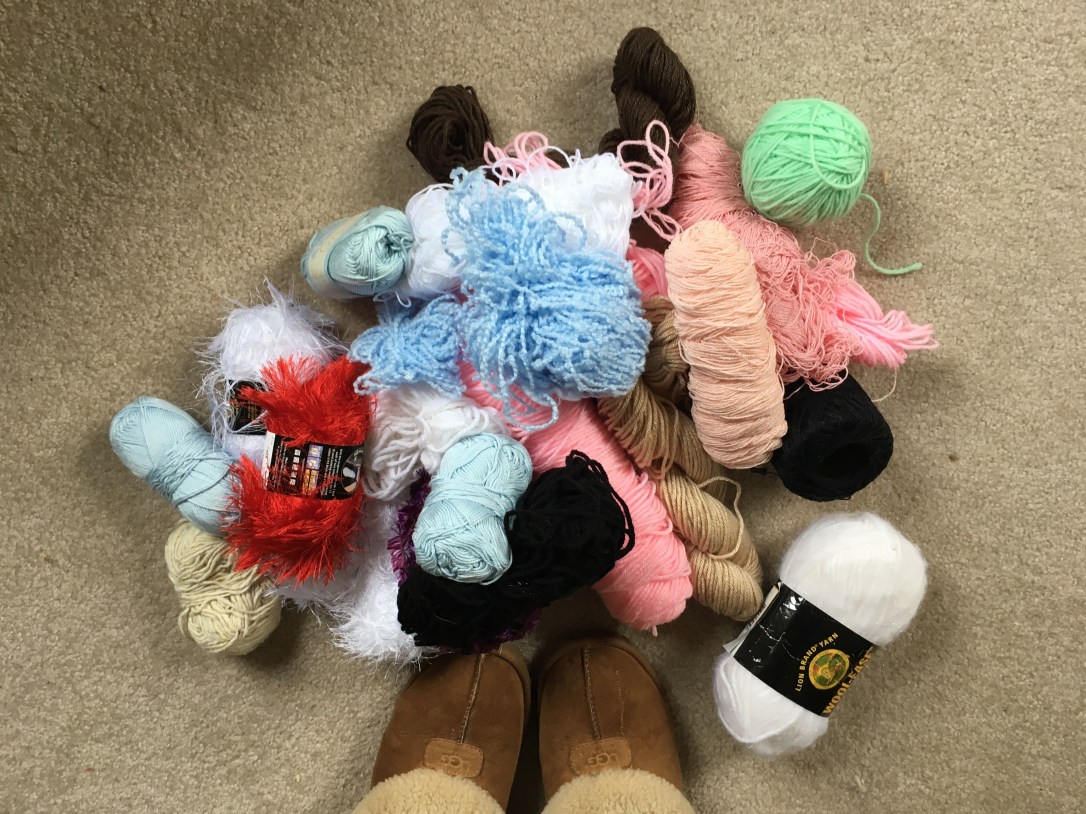
The Wandering Bits & Pieces pile is for all of those little bits and pieces of yarn leftover from completed projects, as well as their corresponding swatch(es).
Here are a couple of Wandering Bits & Pieces… I’m still sorting out the rest!
And last but certainly not least, is the Won’t Use pile for all yarn that I liked when I bought it, but have decided that I don’t really like anymore; or just don’t have room to store. It also includes yarn that I’ve had FOREVER, never done anything with, and feel that is unlikely to change. 🙂
The Won’t Use yarn pile is surprisingly larger than I had thought it would be… very proud of myself for resisting the urge to hoard yarn…!
The best part of this sorting phase of yarn stash organizing? I GET to decide which yarn goes where! The hardest part? I get to DECIDE! I was definitely glad to have some good knitting and a delicious latte on standby for a (few) breaks from decision-making-overload! 🙂
Step 2: Sub-Categorize…
Next, I’ll need to pick a way to sub-categorize my five piles of yarn. The yarn that will likely be most heavily involved in this stage (and the next) is the Will Use No Pattern Yet pile because that’s where the majority of my yarn is! (I’ve been working on Step 2 for awhile now…)
It took me a long time to decide how to sub-categorize the “Will Use No Pattern Yet” pile of yarn. Since this is all of my free and available yarn, there is a large volume involved. And there are SO many options to choose from… I could sub-categorize according to fiber content, or color, or yarn weight, to name just a few.
Having spent considerable time going through this pile of yarn, I have finally decided to sub-categorize it by fiber content because that is often where I start when planning a project. Now to actually divide out all of this yarn!
After much thought, I decided that it makes the most sense to sub-categorize my WIPs pile and my Will Use Have Pattern pile according to project.
WIPs, by project!Will Use Have Pattern yarns, by project!
I put each project & all the yarn that goes with it into it’s own gallon zip-lock bag, along with it’s pattern and needles. This keeps the project all together in one place, ready to pick up and get going whenever I’m ready! No hunting around for the pattern, or the rest of the yarn, or trying to remember which needles I was using/planning to use…! 🙂 This also provides of peace of mind by preventing me from accidentally using up yarn that was designated for one project to make something else.
The Wandering Bits & Pieces pile I believe I will sub-categorize by project as well. I think I’ll put the swatches and leftover yarn for each project in it’s own small plastic bag and label the bag with the name of the pattern, and perhaps of the yarn as well. 🙂 This will make it easy to find and identify the right yarn later on if/when a repair may be needed. Also, I’ll be able to tell at a glance whether I have enough yarn leftover for another small project, or whether I need to save it for potential repairs only.
Yarn in the Won’t Use pile will be categorized by destination. Yarn to give away at Guild Fiber Swaps, and yarn to give away to non-Guild friends/family.
Step 3: Document Yarn Data…
Now it’s time to decide how to document all of my neatly organized and sub-categorized yarn so that I can quickly and easily see what I have! When it comes to keeping track of yarn data, one could go several ways. There’s the digital way – I could document and track the yarn in my stash electronically on Ravelry. Here’s a link to a great blog post by Stacey of Fresh Stitches, about how to use Ravelry’s handy yarn stash feature! One of the things I find most exciting about using Ravelry to keep track of yarn stash is that once all of your yarn is listed in your Ravelry Stash, you can do a search for only patterns using yarn that you already have in your stash! SO helpful!
And then there’s the physical/tactile way – I could create and keep an actual, physical Yarn Stash Notebook.
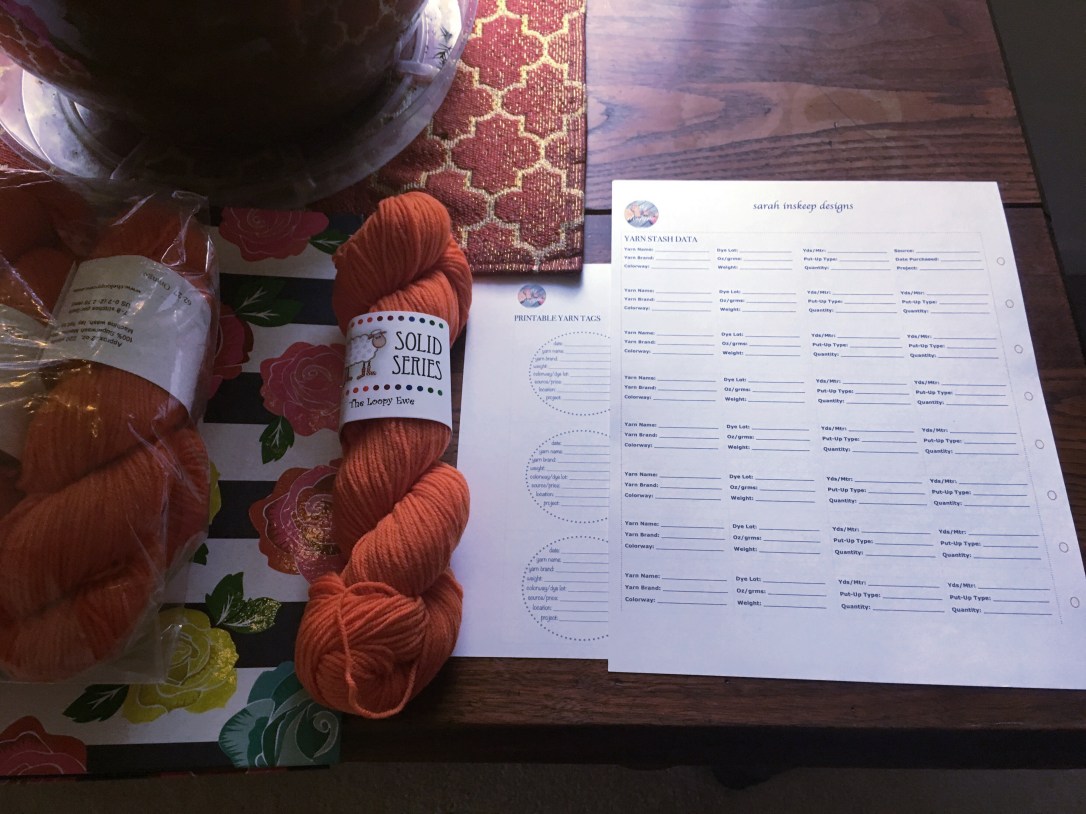
Notebook, hole punches, yarn data template & yarn tags, and pen – ready to create my Yarn Stash Notebook!
Yarn data can be handwritten and a small sample of each yarn attached to pages kept in a three-ring binder. The binder can be decorated as desired, and decorative penmanship can be used on the pages.
This option appeals deeply to the artist in me, and I REALLY love the idea of being able to see the true colors & touch/feel the texture of an actual sample of my yarn while planning a project – without having to go hunt down the skein(s) in the bins first!
Notebook, yarn, and templates ready to create my Yarn Stash Notebook!
In fact, I believe I will go ahead and make a Yarn Stash Notebook first. Later on someday, I may add my yarn stash on Ravelry also, but for now, making the notebook will be enough. Here’s a link to a very helpful post I found by Dedri of the Lookatwhatimade blog. She talks in detail about how to create a Yarn Stash Notebook.
I decided to create my own templates, both for the Yarn Stash Notebook pages, and for optional yarn tags. My Yarn Stash Data template (for notebook pages) is double-sided with places to record important yarn info on the front, and free space to make any notes you wish about that yarn on the back. I found Dedri’s advice to either print the template pages out on heavy paper such as card stock, or laminate them to be very important. It really helps to have nice stable pages to attach the yarn samples to.
I’m so excited to be able to offer free PDF downloads of both my templates to all of my Newsletter Subscribers (current & new)! If you are a current Subscriber, you can access your free template downloads in the Newsletter!
If you would like to become a Subscriber and be kept in the loop with knitting tips, discounts, & coupon codes, please click here to sign up to receive my Newsletter and you’ll receive an email with links to the free template downloads!
Step 4: Storage…
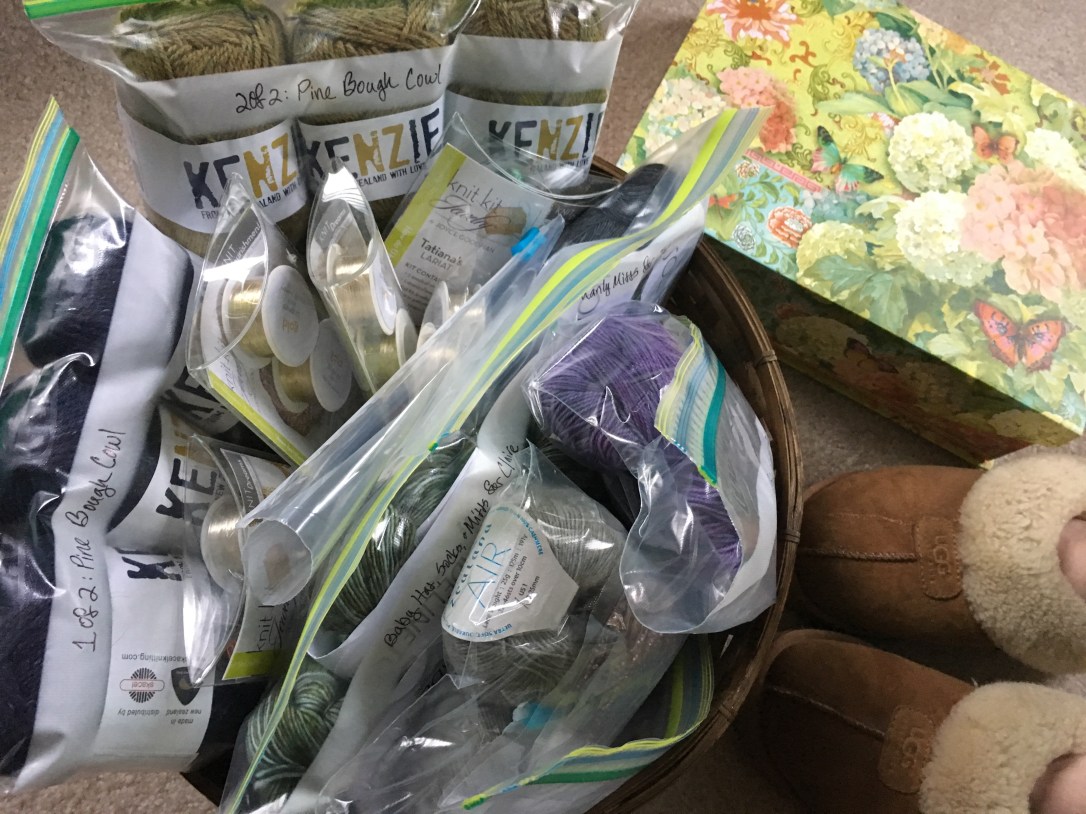
I don’t know about you, but for me, “out of sight” really does become “out of mind” quickly, and I want to finish my works in progress so I can use them or gift them! To keep my WIPs projects on my mind, I’ve decided that I’ll store them in a pretty basket and set it out by my favorite knitting spot in the living room! That way I’ll see them often, and it’ll be very satisfying to see the number of WIPs in the basket dwindling!
Basket of WIPs, ready & waiting!
For my Will Use Have Pattern yarns, I’ll make use of another nice basket. These “next up!” projects also need to be visible and easy to access so they don’t become forgotten in the middle of the business of life.
Basket of Will Use Have Pattern yarn!
My Will Use No Pattern Yet yarn will live in three large plastic tubs. (I still need to purchase one more…) I’ll label them Boxes A, B, & C so that I can specify in my Yarn Stash Notebook where each individual yarn is located. This will make finding the yarn I want for a particular project so much faster and easier!
Will Use No Pattern Yet yarns waiting to be documented in my Yarn Stash Notebook!
The Wandering Bits and Pieces yarn can go into one of several large cardboard boxes I have saved. Since this is a growing yarn pile (it gets bigger every time I finish another project), it’ll need to be a nice big box. And since it’s made of cardboard, it’ll be easy to label with a sharpie!
I’ll put my Won’t Use yarn in a couple of totes or plastic bags so it’s easily portable. The bags of yarn to be given away at the Guild Yarn Swap will go with other Guild stuff, and the yarn to be given away to other friends & family will go by the door so that I don’t forget it!
Step 5: Shop Your Stash!
With my yarn stash tidy and organized I’ll be able to easily see what yarns I have and how much of each. This will save me a lot of time and money! All that remains is to remember to use my Yarn Stash Notebook to shop my stash first when I’m considering a new project or design!
Since quite a lot of yarns living in stashes are leftovers from previous projects, I took a look around and came up with a whole list of cute, and interesting patterns that are great for using up odd bits and pieces of leftover yarn! I can’t WAIT to try them and whittle down some of my stash! I hope these are helpful for you and your yarn stash as well!